How AI Upscaling Works: What It Can't Add to a Photo
How AI upscaling works: it invents plausible detail, not recovers lost pixels. When to upscale before or after editing, and how to do it in Plurel.
Updated Oct 14, 2026 7 min read
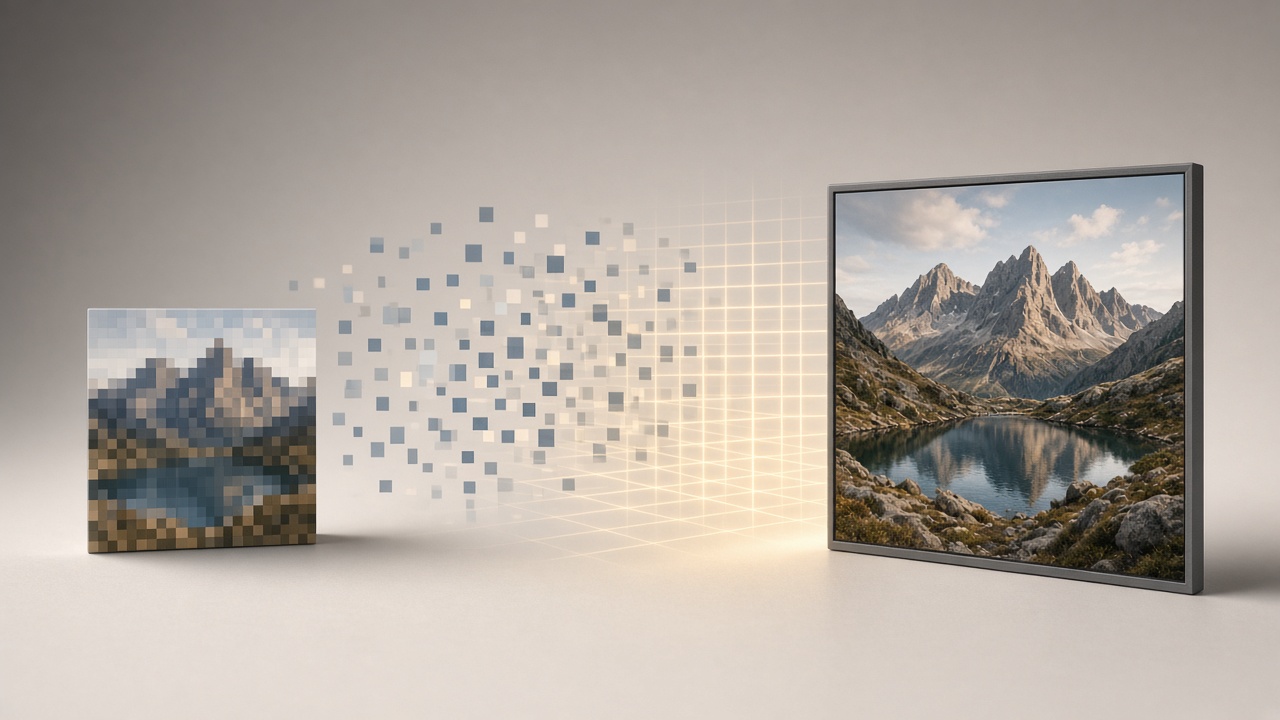
Upscaling makes a small or soft image bigger and sharper by predicting pixels that were never captured. It is not a zoom lens and it cannot recover detail the camera never recorded — it generates plausible detail based on patterns learned from millions of other photos. Knowing that difference changes when you should reach for it and what you should trust in the result.
What "AI upscaling" actually means
The old way to make an image bigger is interpolation: bicubic or bilinear resizing, which just does math on the pixels you already have and spreads them across more space. It never adds information, so a blurry face stays blurry, just larger.
AI upscaling works differently. A neural network trained on pairs of sharp and degraded images learns what detail usually looks like at a higher resolution, then applies that learned pattern to your specific photo. Many different high-resolution images can shrink down to the same low-resolution one, so the model has no single correct answer to return to — it has to pick the most plausible reconstruction based on everything it learned from natural images. That's the whole concept in one sentence: the model is guessing, intelligently, not recovering.
How the model learns to guess well
Developers build these models by working backward from sharp images. They take high-resolution photos and deliberately degrade them — blurring, shrinking by a factor like 2x or 4x, adding noise and compression — then train the network to undo exactly that damage, millions of times, until it gets good at turning blur back into texture that looks right to a human eye, not necessarily texture that matches what was actually there. The choice of degradation used in training decides what kind of real-world input the finished model can actually handle, which is why some upscalers are trained on a wide mix of realistic degradations rather than one clean downsampling method.
Different model architectures reach the final image in different ways — some stack repeated processing blocks, some are built from vision-transformer components, and diffusion-based upscalers build up detail through many rounds of denoising rather than a single pass. Whichever route it takes, the output always looks sharper. Whether it's correct is a separate question.
Why upscaled detail is invented, not recovered
This is the part worth remembering before you upscale anything where accuracy matters: a face, a signature, a license plate, a piece of evidence. The model fills gaps with its best statistical guess, and that guess comes from its training data, not from your actual scene.
The training objective changes how obvious this is. A model optimized purely for pixel accuracy tends to produce an averaged, smoothed-out result, because it's hedging across many possible answers rather than committing to one. To avoid that smoothness, sharper models add extra training signals borrowed from image-generation research. That produces sharper, more realistic-looking texture, but it may not match the true scene pixel for pixel — a real concern in medical and forensic imaging, where an invented detail could be mistaken for genuine evidence. The same trade-off applies to an ordinary photo of a relative: the upscaler may add a wrinkle, a freckle or a tooth that was never there, simply because it looks statistically plausible.
Treat every upscaled image as a plausible reconstruction, not a factual record. For anything where accuracy outranks appearance — IDs, documents, measurements — don't upscale it and then trust the new detail.
GAN-based vs. diffusion-based upscalers
Most fast, everyday upscalers (including the ones built into phone photo apps) use a GAN-style architecture; some newer tools use diffusion instead. The practical differences:
| GAN-based | Diffusion-based | |
|---|---|---|
| Speed | Seconds to tens of seconds per image | Tens of seconds to minutes per image |
| Texture | Sharp, realistic textures from adversarial training | Built up gradually through iterative denoising |
| Stability | Training can be unstable, occasionally producing unnatural artifacts | More stable training, with more varied output |
| Control | Little to none | Can be steered with text-prompt guidance |
Researchers still argue about which family genuinely wins. There's a widespread view that diffusion-based models beat GAN-based ones at super-resolution, though the fairness of those comparisons is contested. For a quick, cheap pass, GAN-style speed usually wins. For a hero image where you want some say over the invented detail, a diffusion-based pass with prompt guidance is worth the extra wait.
One practical limit is worth planning around: 4x is the mainstream upscale factor, and quality falls off sharply past about 8x. Don't expect a thumbnail to become a clean poster print — you'll get a bigger file, but the artifacts get bigger too.
Before or after editing? Order matters
This trips people up constantly. The rule: do your content edits first, upscale last.
- Make or source the image at a normal working resolution.
- Do every content change — remove the background, paint out an object, change the outfit, retouch a blemish, swap the sky — while the file is still small.
- Upscale as the final step, right before you export or print.
Why this order and not the reverse:
- Editing tools work best on the resolution they were trained for. Background removal, inpainting and style edits are more precise on a normal-size file. Run them on an already-upscaled image and you're asking the editor to treat invented texture as if it were real detail, which compounds small errors.
- Upscaling early wastes the invented detail. If you upscale a draft and then paint over half of it, the new paint won't match the AI-invented grain and sharpening pattern of the untouched area, and you'll see a seam.
- It's cheaper. Every edit pass costs credits at whatever resolution you're working at. Upscale once, at the end, instead of on every intermediate version.
The one exception: if your source photo is so low-resolution that an editing model can't make sense of it — a tiny face crop, a heavily compressed screenshot — upscale first just to give the editor enough pixels to work with, then upscale again at the end for final export.
Do it in Plurel
Plurel's Upscale tool runs a dedicated image upscaler for 1 credit per image, taking any picture up to 4K.
- Open plurel.tech and sign in — free with Google, no card needed.
- Go to the Image row under the composer and choose Upscale, or jump straight there with plurel.tech/?model=upscale.
- Upload the photo you want to enlarge — a generated image, a phone photo, an old scan.
- Run it. The pass costs 1 credit and returns a sharper, larger version in the same chat.
- If you also need content changes, make them first with Edit (priced the same as a picture on whichever image model you pick), then come back to Upscale as the last step.
If you're starting from a prompt rather than an old photo, it's often cheaper to generate at high quality from the start instead of upscaling afterward. Plurel Pro (ultra) already makes 4K images directly for 1.5 credits, and GPT Image 2.5 (3.5 credits) and Nano Banana 2 (4 credits) both produce sharp, detailed output well suited to products and portraits without a separate upscale pass. Reach for Upscale specifically when the image already exists — a phone photo, a scan, something a friend sent you, or an older generation you want to reuse at a bigger size.
A note on follow-ups
Because Plurel's chat edits what was just made, you can upscale and then immediately ask for a small follow-up change in the same thread, and it will apply to the result you just got — useful for "upscale this, then warm up the colors a touch" without re-uploading anything.
Troubleshooting and tips
- Face looks subtly wrong after upscaling. This is the hallucination problem in action — the model guessed at skin texture or eye detail that wasn't resolvable in the source. Try starting from the best-resolution original you have rather than a screenshot of a screenshot.
- Text or a logo gets mangled. Fine text and logos are exactly where generative upscalers invent the wrong shapes. If the image has important text, consider Qwen Image 3 Pro for the original generation, since it's built for legible small text, rather than relying on upscaling to fix text afterward.
- Image still looks soft above 4x. That matches the general pattern of quality holding up to roughly 4x and degrading past it. Don't chain multiple upscale passes expecting it to keep improving — it won't.
- Colors or contrast shift slightly. Minor shifts are normal with both GAN- and diffusion-based upscalers because the texture is regenerated, not copied. If exact color accuracy matters, upscale first, then do a quick color pass with Edit afterward.
For more on what diffusion models can and can't fix in a shot, see How AI Image Generators Work: Diffusion vs Autoregressive, and if the issue is an AI-generated image looking subtly off rather than a resolution problem, Why AI Video Looks Wrong covers the same hallucination idea for motion.
Upscaling is a genuinely useful last step, not a fix for a photo that was never sharp in the first place — know that going in, and the results stop being surprising.
Questions people ask
- Does AI upscaling restore detail that was actually lost?
- No. The model fills in gaps with a statistically plausible guess learned from training data, not the original scene, which is why it's called generative rather than restorative.
- What's the difference between AI upscaling and just resizing a photo?
- Classic resizing (bicubic or bilinear) only stretches existing pixels and adds no new information. AI upscaling uses a trained model to generate new texture and detail that wasn't in the original file.
- Should I upscale a photo before or after editing it?
- Edit first, upscale last. Content edits like background removal or retouching work more reliably on a normal-resolution file, and upscaling as the final step avoids mismatched texture between edited and un-edited areas.
- Can AI upscaling be trusted for faces, text or official documents?
- Treat it as a plausible reconstruction, not a factual record. It can invent a wrinkle, a digit, or a letter shape that wasn't actually there, which matters for IDs, forensic images or anything where accuracy outranks appearance.
- How much does upscaling cost in Plurel?
- The Upscale tool costs 1 credit per image and takes a picture up to 4K.
- Is there a limit to how much an image can be upscaled?
- 4x is the common sweet spot for most upscalers, and quality drops off sharply beyond roughly 8x, so don't expect a thumbnail to become a clean poster print.
Sources
Keep going
How AI Image Generators Work: Diffusion vs Autoregressive
How AI image generators work: diffusion's noise-to-picture steps vs autoregressive token-by-token models, and what each means for your prompts.
Updated Oct 10, 2026
Best AI Image Generator in 2026: 5 Models Compared
The best AI image generator in 2026 depends on the job. Compare Nano Banana 2, Seedream 5, Grok Imagine 2, GPT Image 2.5 and Qwen Image 3 Pro on cost and use.
Updated Sep 23, 2026
Negative Prompt Guide: What to Leave Out of AI Images
What a negative prompt is, which AI image models still honor one, and the exact wording that avoids blurry hands, watermarks, and extra limbs.
Updated Oct 12, 2026
How to Keep the Same Character Across AI Images
Learn how consistent character AI works: reference images, prompt anchors, and editing instead of regenerating. Step-by-step in Plurel.
Updated Sep 27, 2026